Services & Examples of Work
The services that I most frequently provide are cleaning, re-setting, and repairing broken stones. I also duplicate socket-type bases made of limestone when the original is too damaged or fragile to hold the stone, and I will repair broken finials/urns. Whether you own land on which there is an old cemetery in disrepair, or a deceased family member’s gravestone has shifted and is askew, I can provide my skills and services to conserve the stones in question. I also photograph jobs for my own reference, and will email them to customers if they wish; this is especially good for clients who are not close to the cemetery.
Cleaning
Cleaning gravestones is probably the most frequent work done by untrained individuals. Many people have asked me while I worked “What brand of bleach do you use?” When I reply that household bleach, while known for whitening surfaces, is one of the more detrimental solutions that can be put on a gravestone, they are shocked. Likewise, untested products such as "Wet & Forget" and "Citra Shield" may show immediate results; however, the long-term effect on gravestones is not known. The product that I use 95% of the time is called D/2 Biological Solution™ (see "Links" page). It is relatively expensive at $40 or so per gallon, but its thorough testing, environmentally-safe composition, long history and use at some of the country’s most sacred sites has ensured its success. Another tested and approved cleaner that I have used in the remaining cases is Prosoco’s Enviro Klean Revive. I will not pressure wash any stone, and no conservator who follows the "best practices" in the field will. Even though some monument companies will recommend chlorine bleach and water as a cleaning solution, they only do so out of ignorance, for testing that has proven bleach to be harmful to marble and limestone; they might also use it because it is cheap. As well, pressure washing will damage the surface of the stone, creating a 'sugared' look to it, and making it rougher and more likely to be resoiled in the future. (See photo just above "Resetting" below.)
Cleanings may involve scraping lichens from the stone’s surface using soft plastic scrapers or scraps of soft wood. Various non-metallic brushes are used, and in the end, lots of fresh, clean water is used to rinse the biologicals and cleaning solution from the stone. Most cleaning solution manufacturers do not recommend cleaning at temperatures below 50° F; I usually recommend cleaning to be done from March to November as the temperatures will be warm enough for the solutions to work effectively.
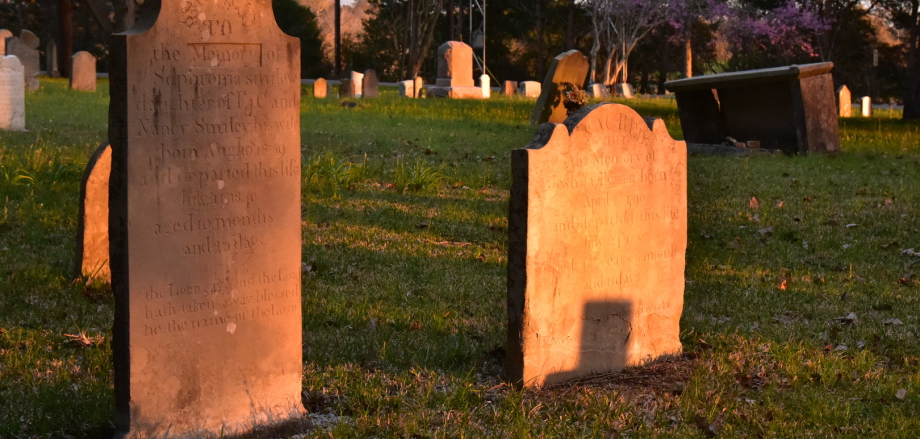
The photos below show a small stone before cleaning with D/2™, after cleaning (and drying), and 8 months after cleaning. While there is a change in the appearance of the stone just after cleaning, many biologicals take some time to be flushed from the stone and its surfaces.
Before Cleaning

After Cleaning

8 Months Afterward

This early marble stone in the Independence Cemetery was soiled with some tree products, as well as several forms of lichen.

The same stone after being reset and cleaned with D/2 and a medium stiff natural bristle brush.
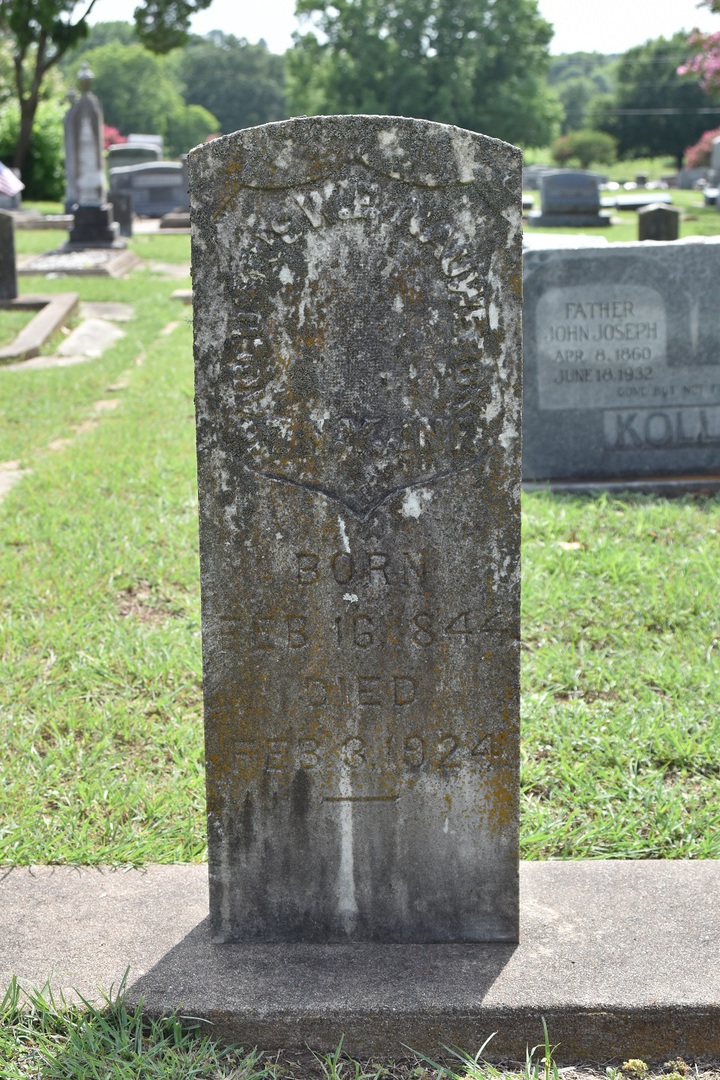
This government-issued Civil War veteran's stone as it appeared before cleaning. Notice how difficult it is to read his name.
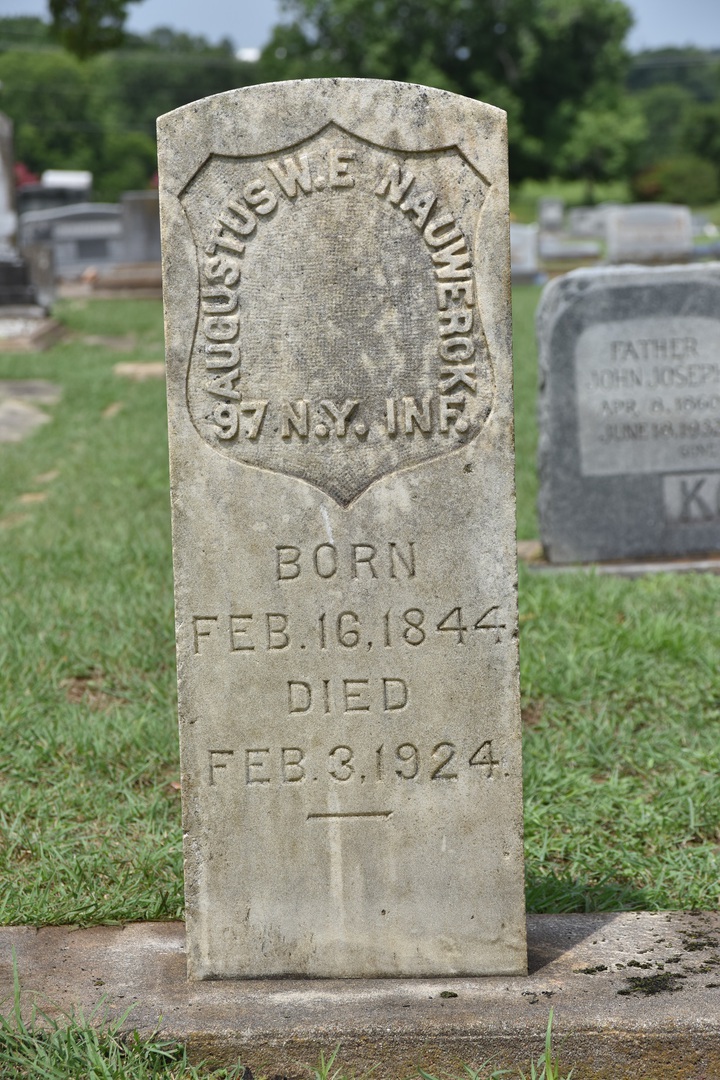
The stone after cleaning with D/2 and a soft, natural-bristle brush, then rinsed with water.
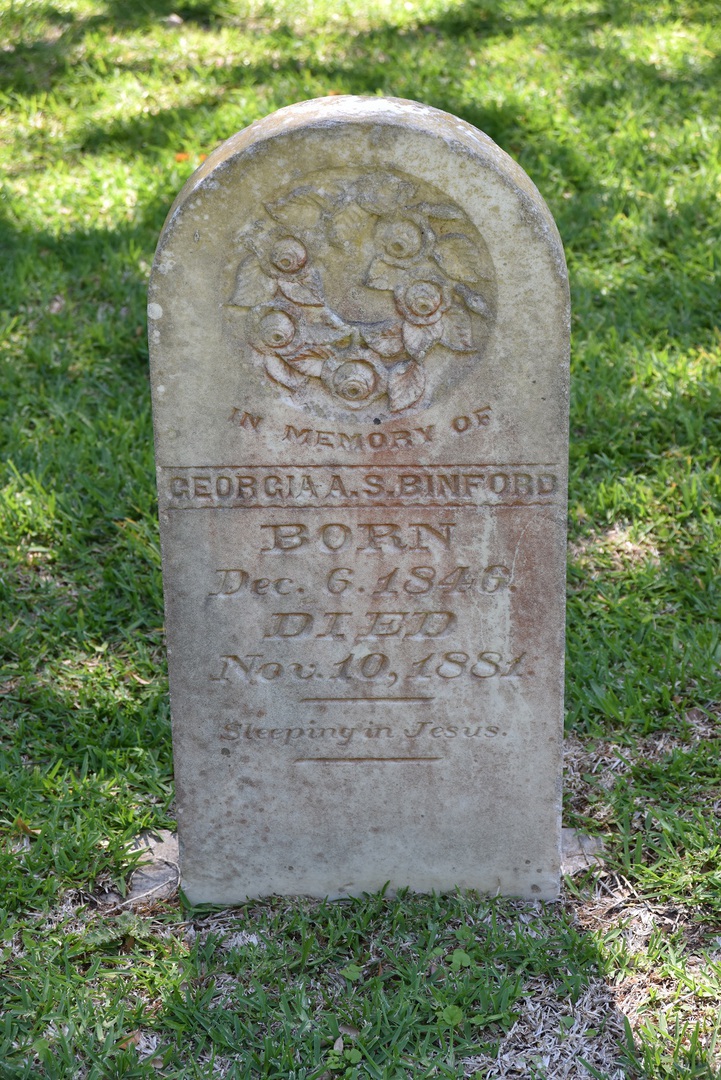
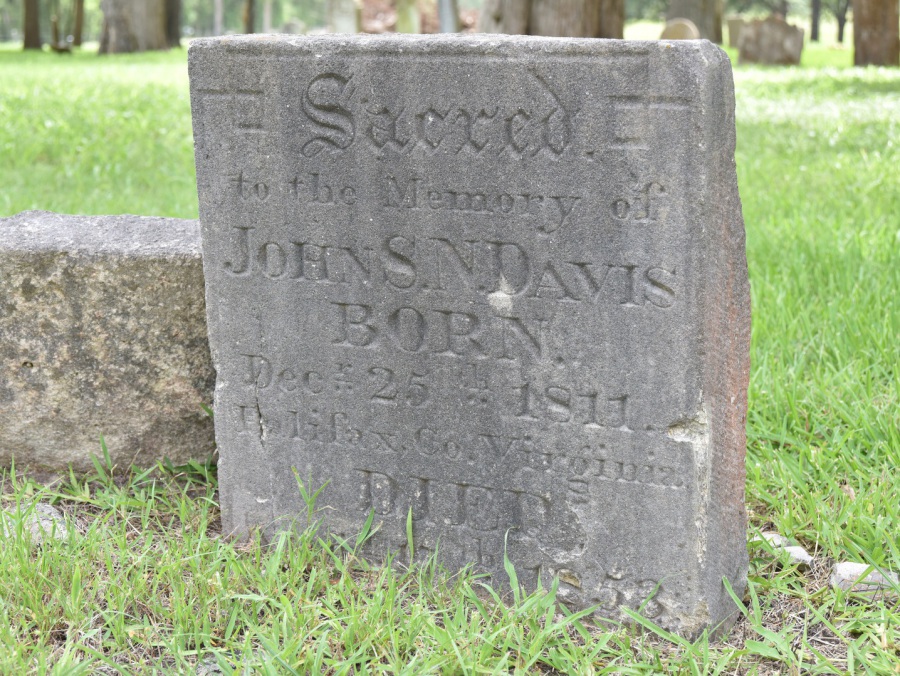
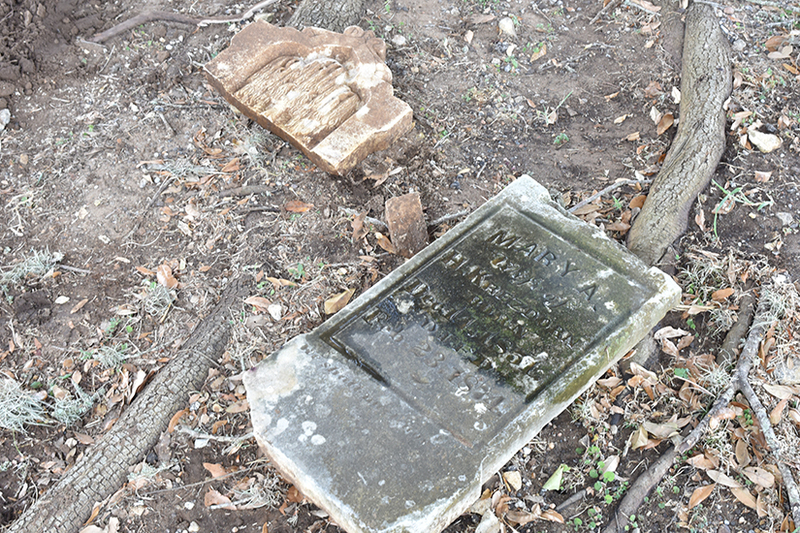
A stone from the Atkinson Cemetery near Chappell Hill, TX as it appeared when I first visited the site.
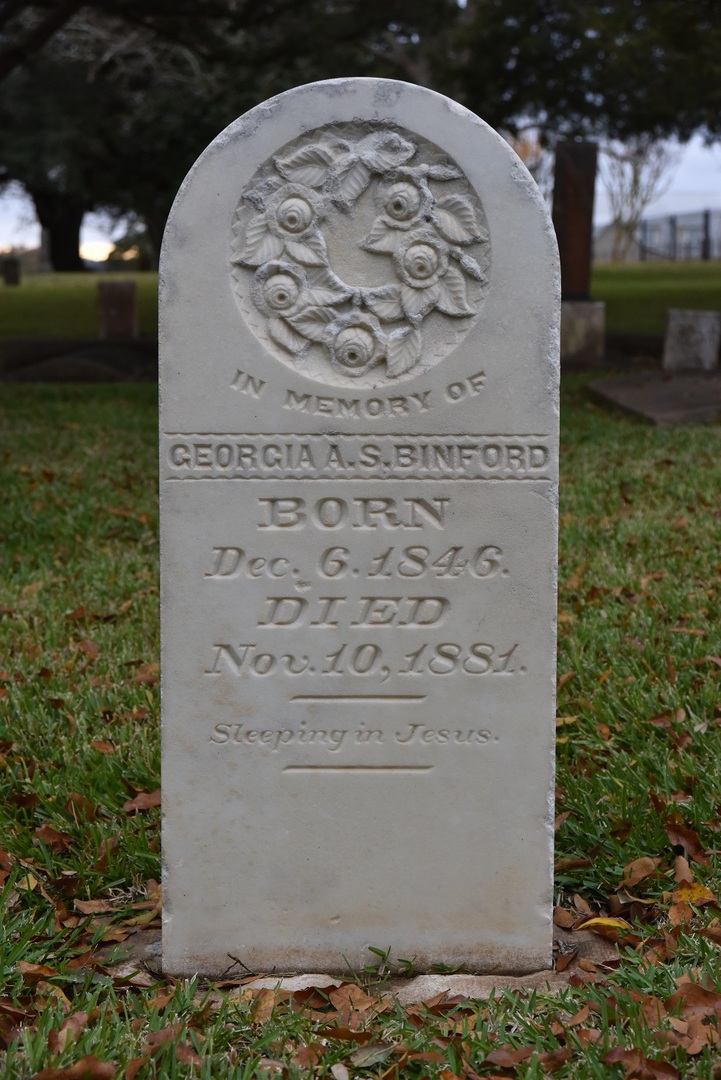
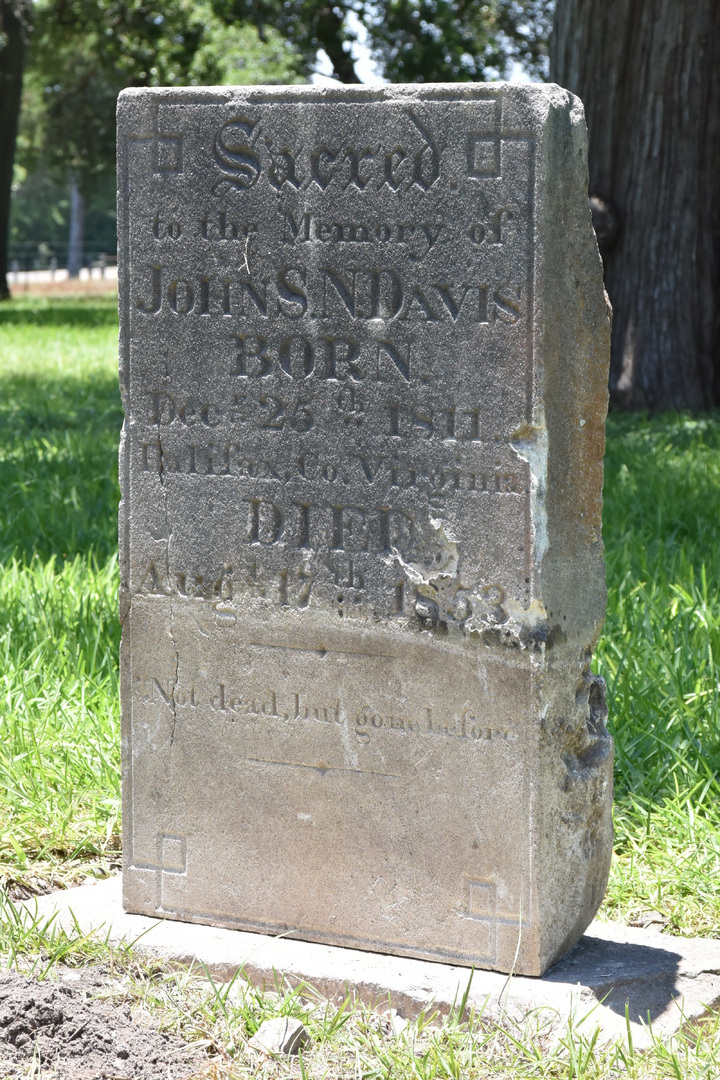
The same stone, four months after straightening and cleaning with D/2. Many times, the reddish biological soiling will take time to be flushed out of the stone, as it is located in the surface, not on the exterior of the stone.

This is an example of how power washing can erode the surface of the stone and round over carving. While the stone is definitely white and clean, the rough surface is more susceptible to biological and environmental soiling in the future. Additionally, the stone's appearance has been changed forever by the monument company's failure to use approved cleaning methods and solutions.
Resetting
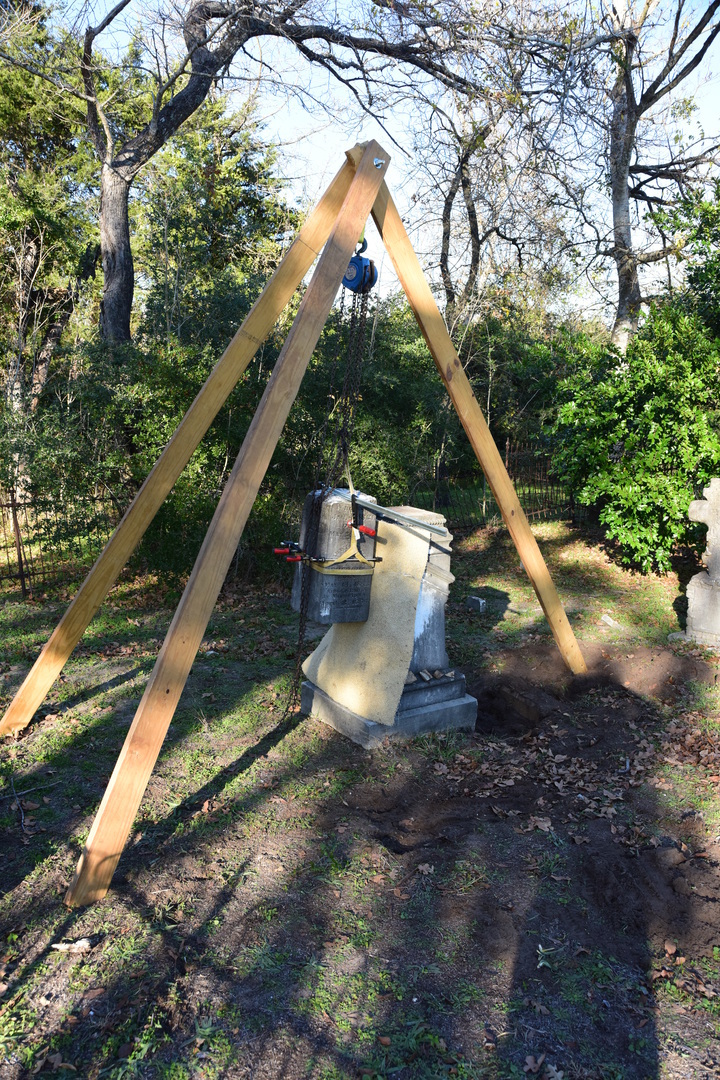
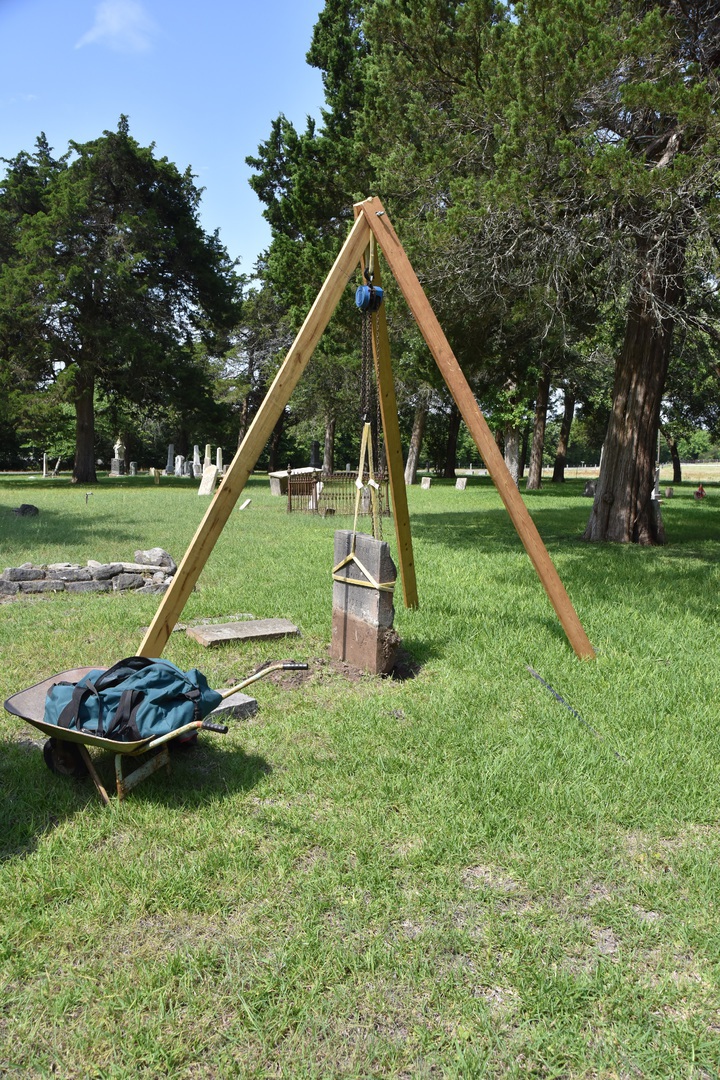
Resetting involves removing a stone from its current position to re-make its base level and the stone plumb. In most cases, the base and the inscribed portion of the stone are separated. An appropriate amount of soil or failed concrete under the base is removed and replaced with a more stable aggregate which is firmly tamped down. The base is replaced and the aggregate is added to low areas or removed from proud areas until the base is level in both directions. The top portion of the stone is then replaced, either being mortared in with Ecologic™ naturally hydraulic lime (NHL) mortar, affixed with small dabs of epoxy, or set upon wedge lead and/or monument setting compound. For bases and stones too heavy to move by hand, a tripod is used along with a chain hoist and nylon slings or a Monumentall™ clamp. I do not use any power machinery to reset stones. I am frequently emailed about a stone that was broken by someone's attempt to straighten it or put it back on a base. Besides the chance of damaging the stone, you might be injured. Don't try it just to save money.
The following photos show a larger marble obelisk, a sandstone tablet, and a modern granite monument being reset.
Multiple-piece Monument

The family marker of the Shepards at the Masonic (Yellow Fever) Cemetery in Brenham was likely broken by a falling limb, a tree, or vandalism many years ago.
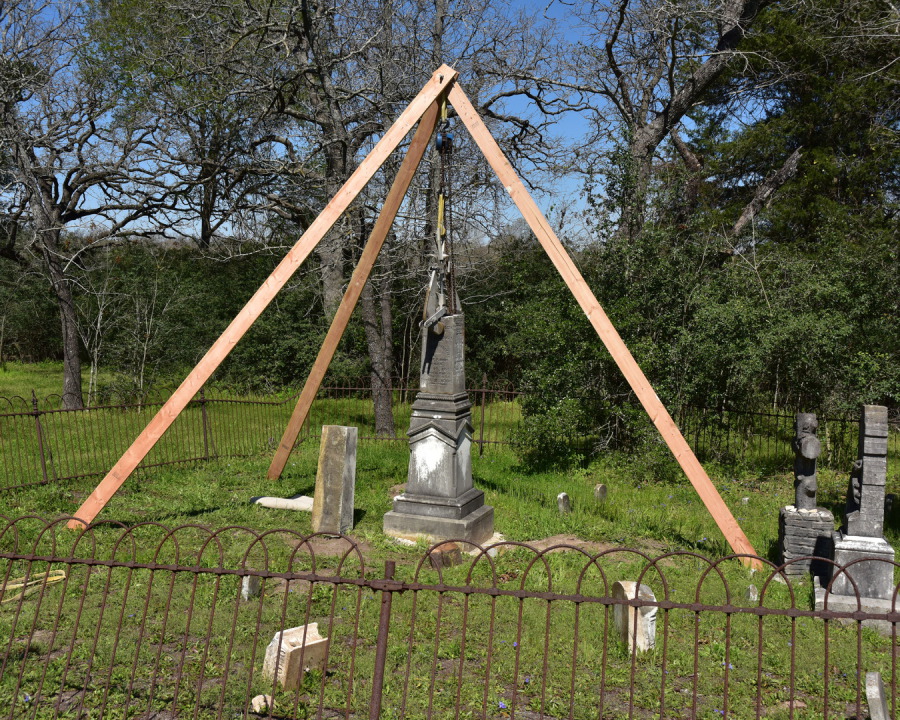
To remove the bottom portion of the tapered column, slings were clamped in place so that the stone did not slip as it was raised and lowered; the carpeting allows the stone to slide down without any damage.

The main section of the shaft is removed.
The two base pieces were lifted together as the top one is not very thick and this makes lifting with slings difficult. The limestone screenings used as a base have been tamped down and levelled.
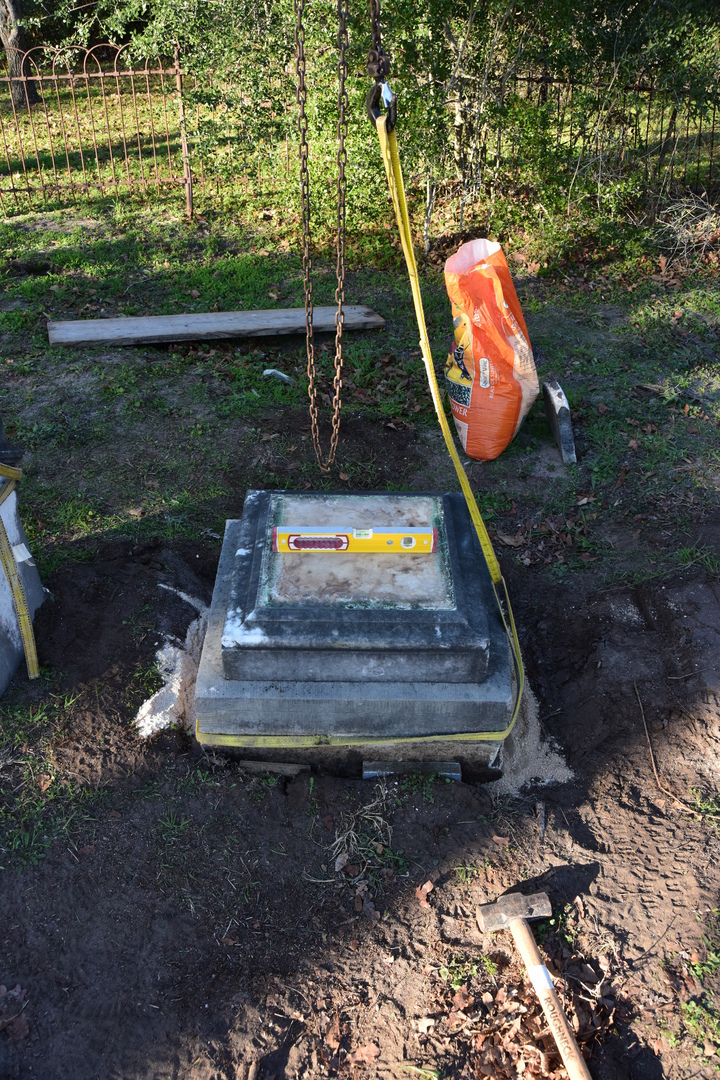
The base portion is checked for level and aggregate is added under the appropriate side. While most multiple-piece monuments were finished with tops and bottoms flat and parallel, sometimes they were not. When this is the case, the base of a monument may need to be set slightly off-level or plumb so that the upper pieces can be re-set truly level and plumb.
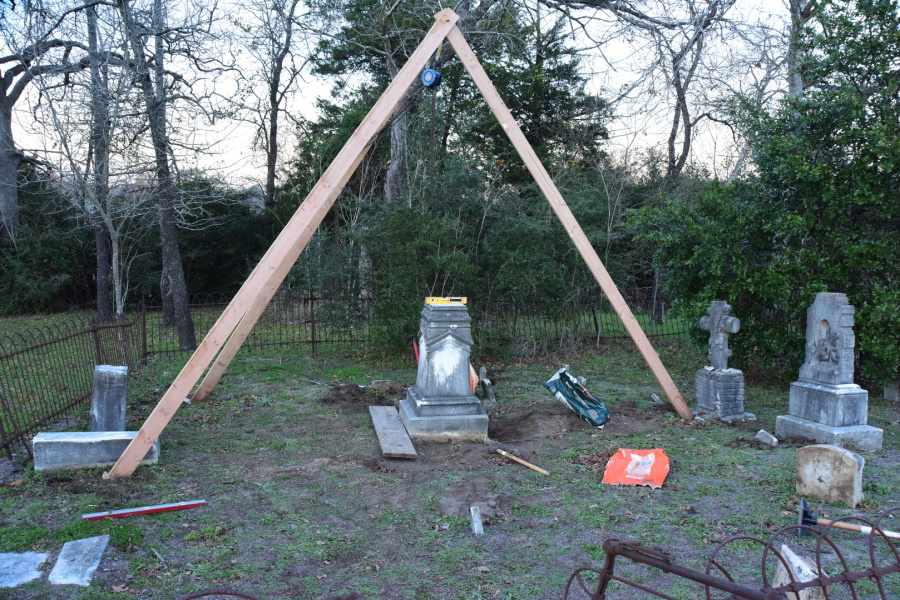
The next section replaced and checked for level in all directions.
The bottom of the tapered column being replaced. The top portion is to be epoxied in place on top when the temperatures warm up.
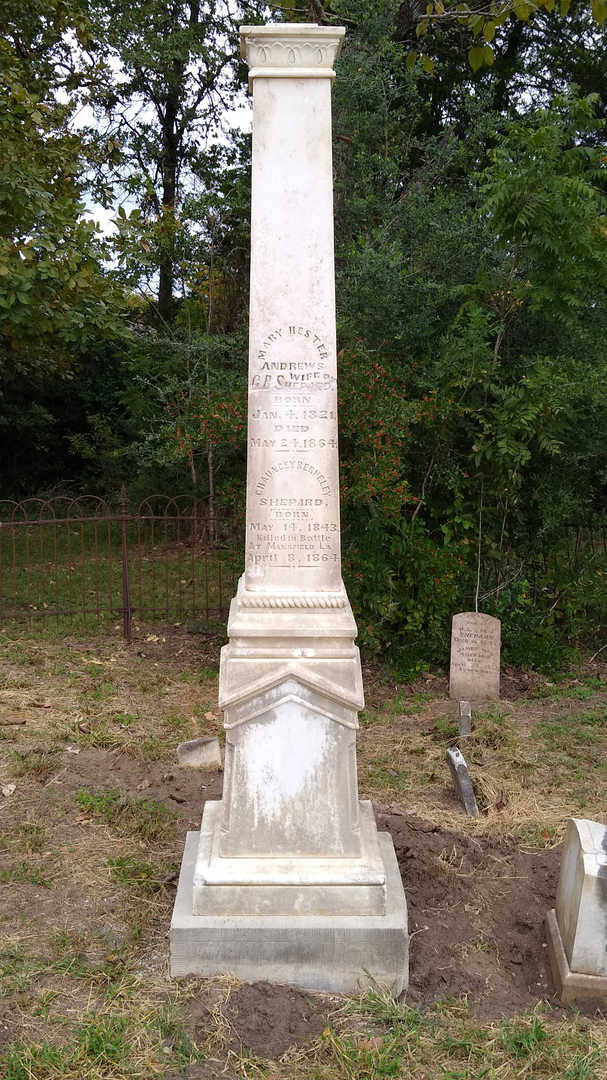
The completed monument in the Shepard plot.
The cap on the top was located near the stone when re-setting was done. The iron pin in it was replaced with one of 304 stainless; as well, the joint line of the top and bottom portions of the broken column was infilled with limeworks Lithomex and the entire stone was given a light overspray of D/2.
A Sandstone Tablet
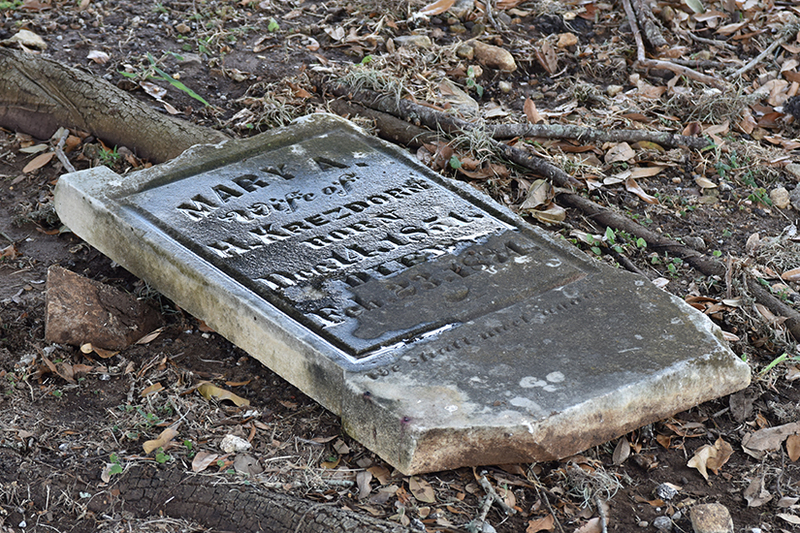
View of stone prior to conservation. The stone was originally not meant to be placed into the ground, so about 1/3 of it was below grade.
Removal of stone from ground.
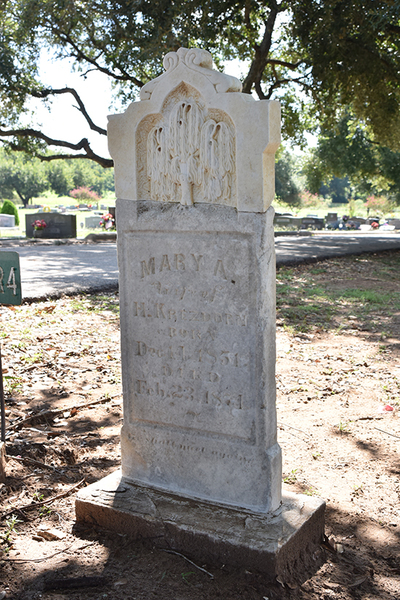
The stone, re-set upon a flat stone from the gravesite, as it probably was in the mid-1850's.
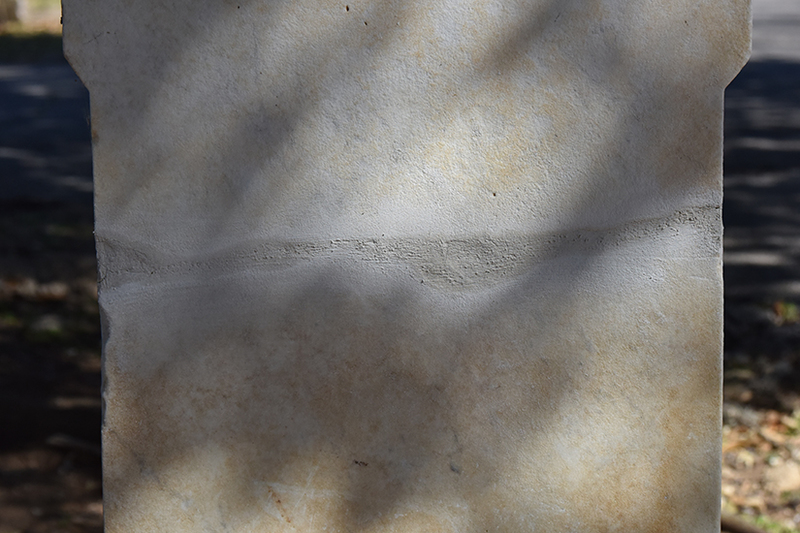
Note the lighter portion of the stone and how the insription and border carving were hidden prior to re-setting.
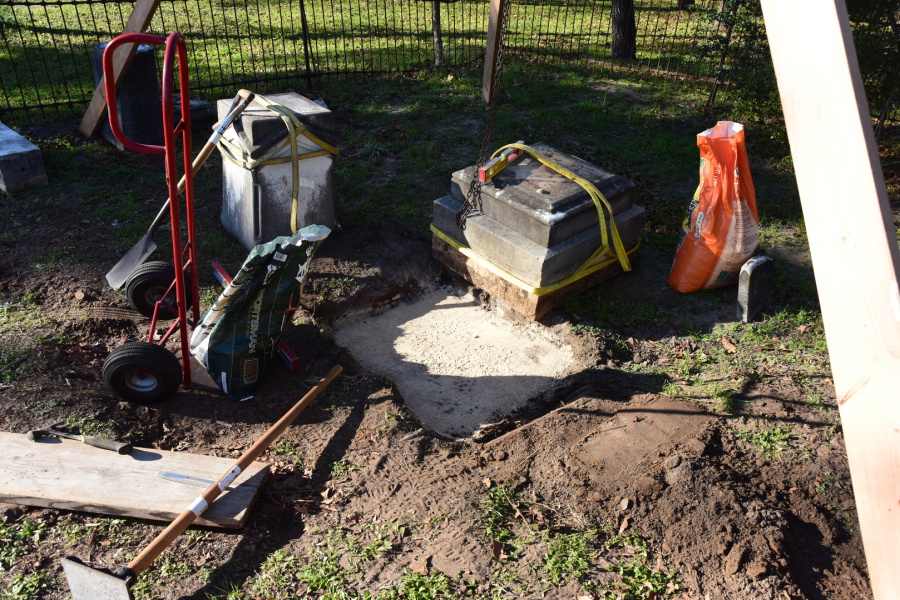
A Granite Die and Base
While granite has been widely sold since the 1920's and termed the "Rock of Ages"™, many older stones are found tilted, shifted, and even fallen. Primarily, this occurs from either a poorly done concrete base under the stone, or compaction of the soil on one side of the stone. Click on the photo to read the caption.


")


Broken Stones
Older stones (and especially those of marble) that are thin or that have intricate parts, are frequently found broken or damaged. If the pieces can be found, they can be cleaned and dry fitted together. At that time, missing pieces are noted and the judgement can be made on infilling the missing areas with mortar made of NHL and marble dust. The broken pieces are epoxied together using Akemi Akepox 2030. While not designed for super-strength bonds, this adhesive was designed for stone bonding and has not failed in any case that I have used it.
Drilling and pinning the stone together is also a method I may use.
The following photos show a medium-sized tablet stone that was reassembled and conserved. Click on a photo to read the caption.


Infill Used When Pieces of the Stone are Missing
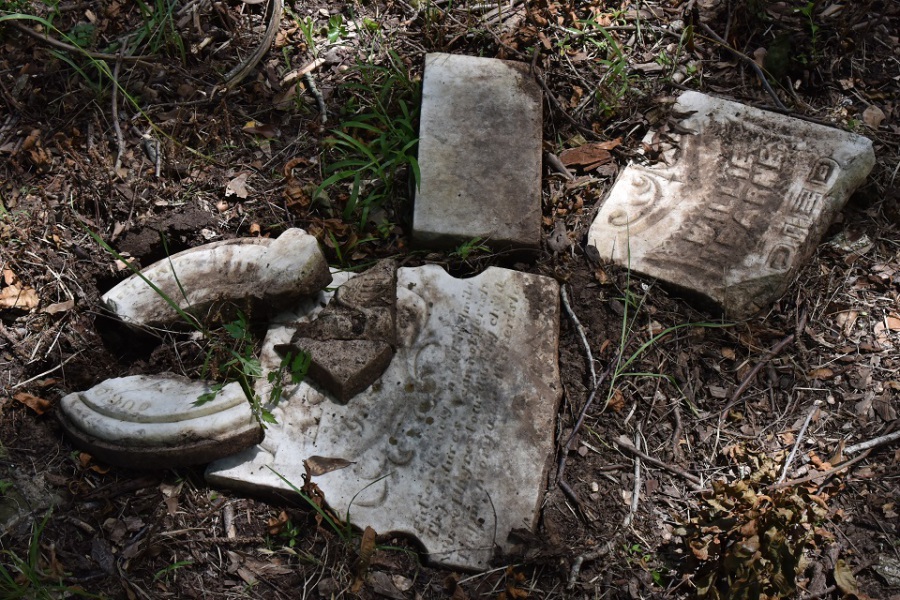
This was the condition of the stone when I first visited the cemetery. After probing the soil for 30 feet around the base, no more pieces could be found.
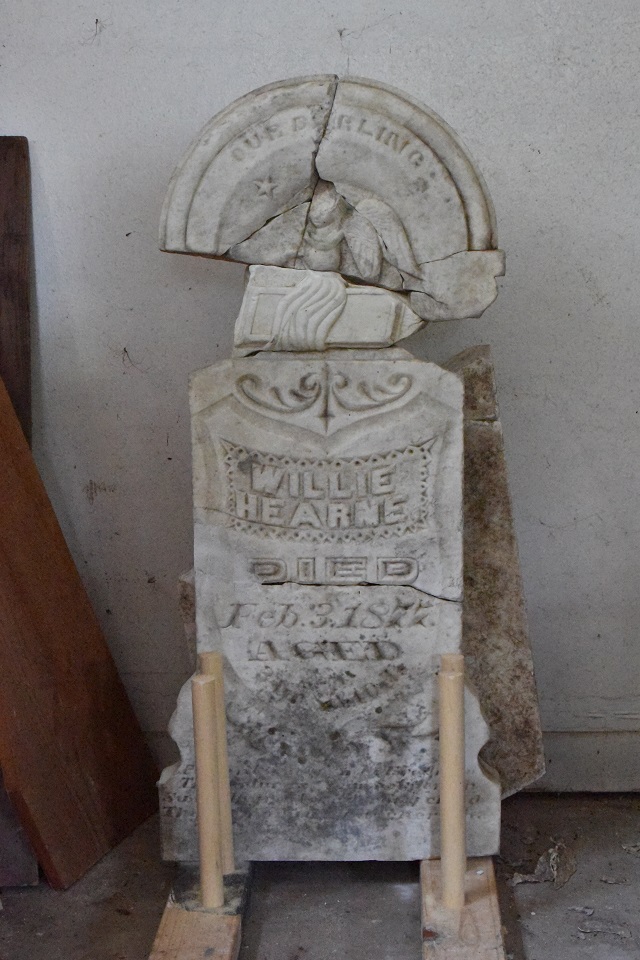
Even after consolidating the pieces, the missing areas are obvious and would detract from the appearance. (The "bonnet" or top portion was not yet epoxied into place in this photo).
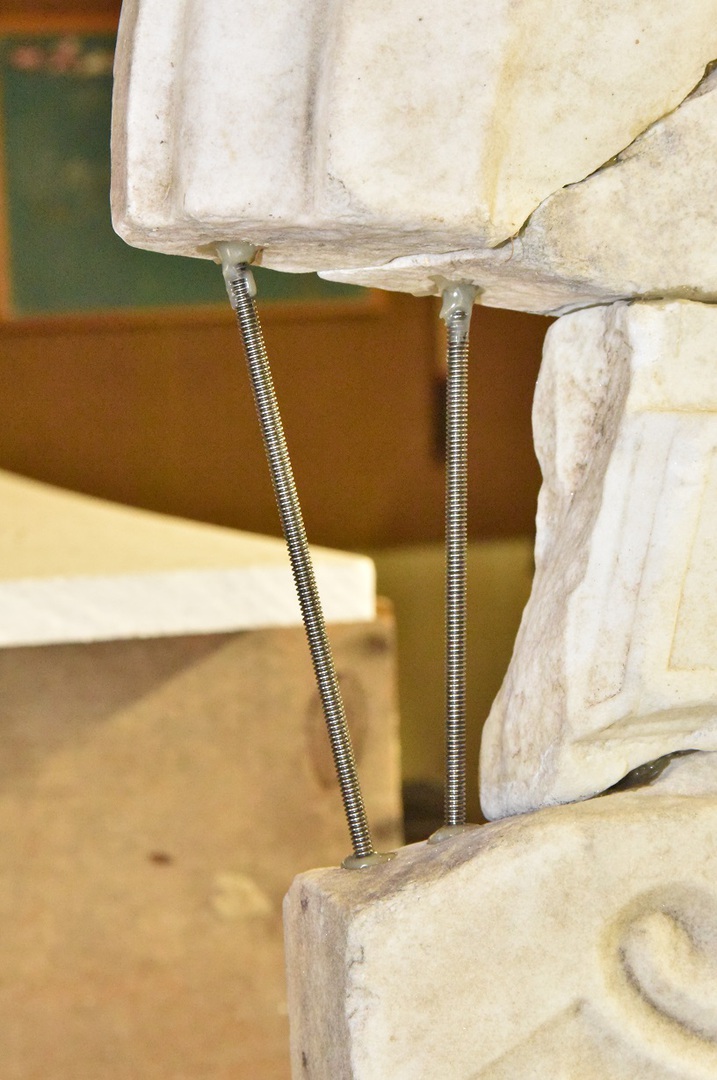
304 stainless rods were epoxied into shallow holes that had been drilled into both top and bottom pieces; these would add strength to hold the "bonnet" in place, as well as give an anchor to the infill that would replicate the missing pieces. limeworks.us Lithomex was used for the infill.
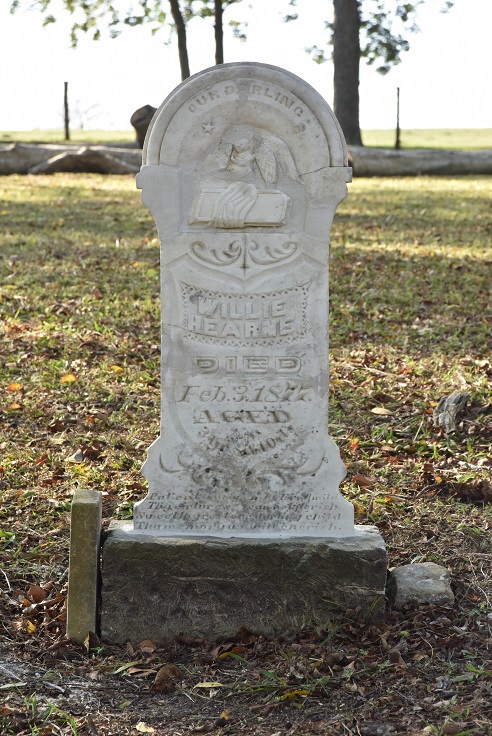
The stone, reset in its socket base at the cemetery. While not a perfect match, the infill allows the stone to keep most of its original appearance and allows it to be reset upright.
Conservation of Two Marble Urns
The following photos show the "start to finish" process of repairing two marble urns that had either been damaged from the iron pin used to anchor one when it was made or to repair an old break. Prosoco HCT and H100 consolidant was used before any epoxying was done. Click on the photo to read the caption.


